| Part No. | Name | Qty | Page |
|---|---|---|---|
| 221-8647 |
g01014499 Illustration 68 NOTICE Failure to follow established procedures can lead damage of the parts. To avoid damage to the parts, always identify mark the parts so that the parts can be installed in same location. to install the seal. regulator. The e
|
1 | 34 |
| 5P-8639 |
Press
|
1 | 61 |
| 8F-0024 |
Assembly
|
1 | 61 |
| 1P-2375 |
Coupler
|
1 | 61 |
| 1P-2376 |
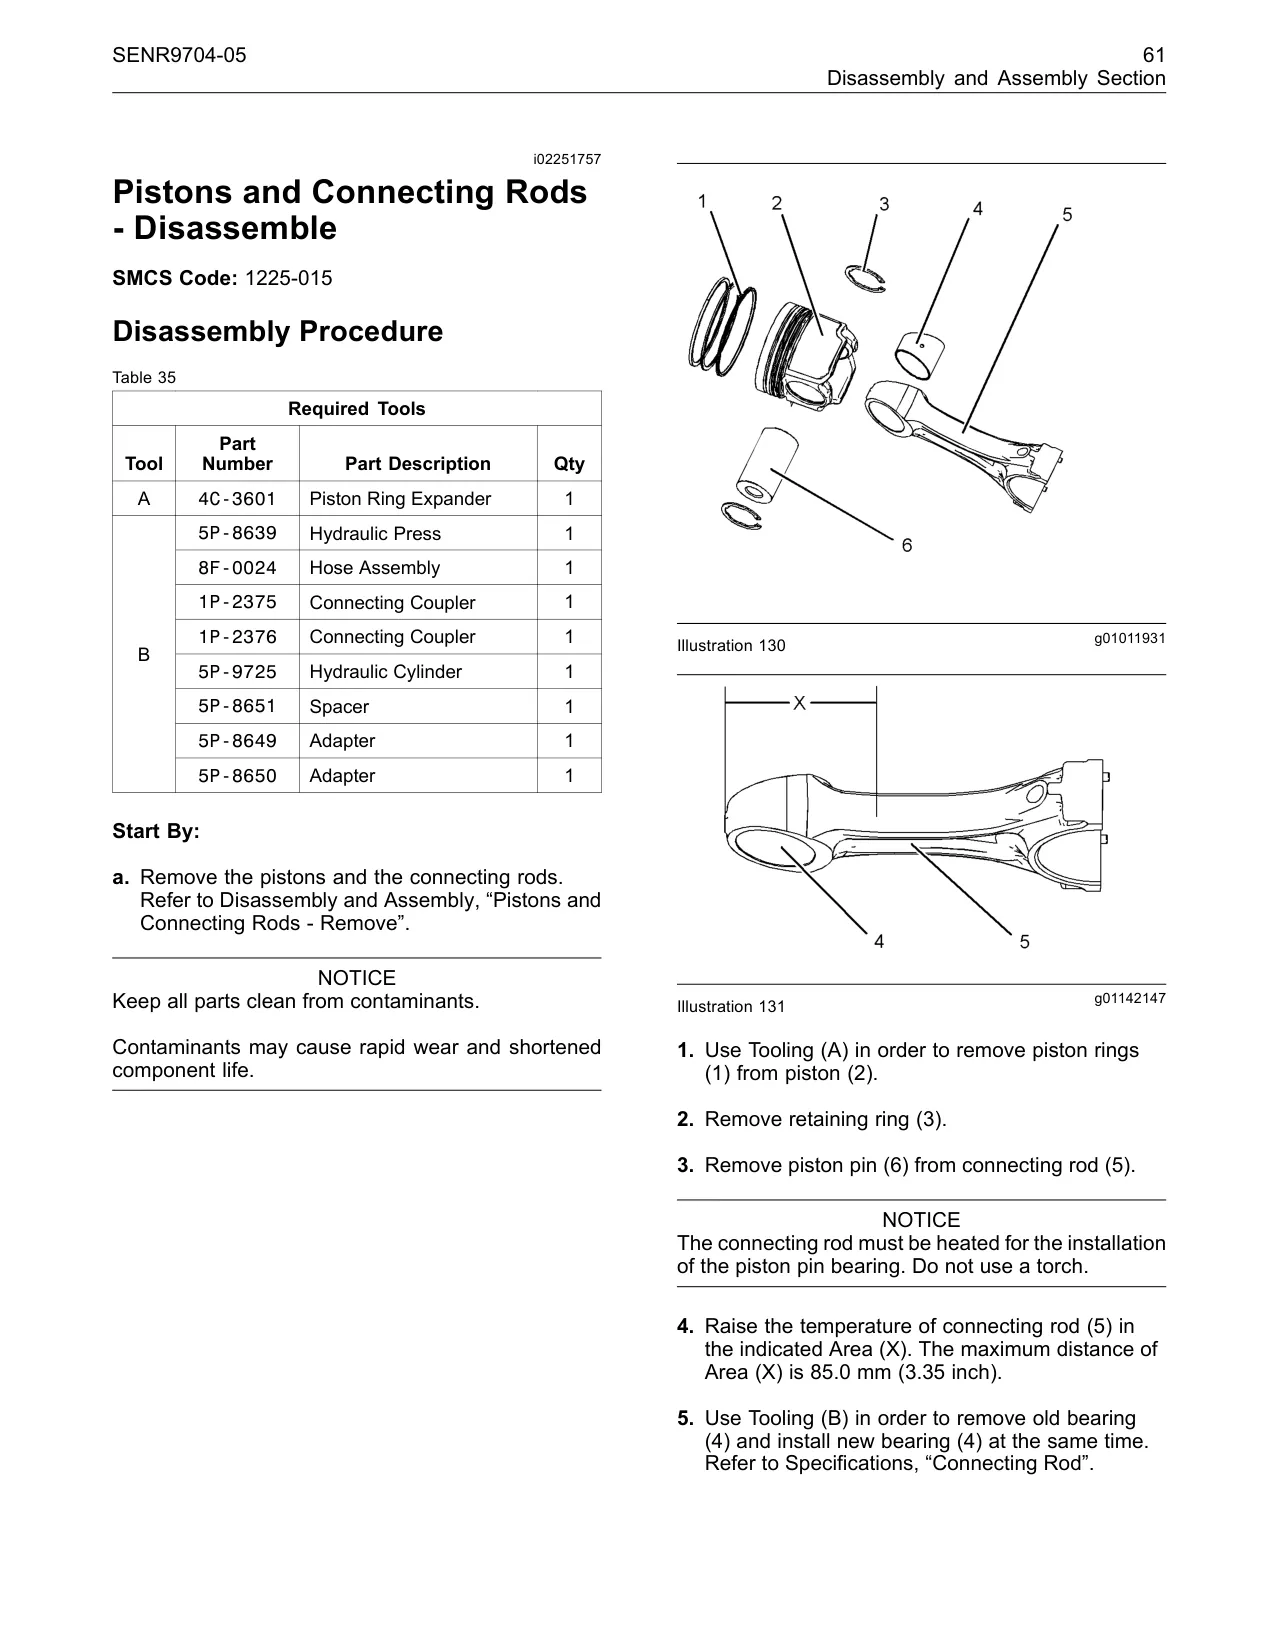
Coupler g01011931 Illustration 130
|
1 | 61 |
| 5P-9725 |
Cylinder
|
1 | 61 |
| 5P-8651 |
5P-8651
|
1 | 61 |
| 5P-8649 |
5P-8649
|
1 | 61 |
| 5P-8650 |
the connecting rods. Assembly, “Pistons contaminants. g01142147 Illustration 131 rapid wear and 1. Use Tooling (A) in order to remove piston rings (1) from piston (2). 2. Remove retaining ring (3). 3. Remove piston pin (6) from connecting rod (5). NOTICE
|
1 | 61 |
| 2P-5518 |
Tool Refer to Disassembly Pan - Remove contaminants. wear and bearing cap (1). 7 crankshaft main through No. 6 installed. crankshaft main bearing cap (1).
|
1 | 65 |
| 138-7574 |
Bracket
|
2 | 68 |
| 8T-5096 |
Indicator Group contaminants. rapid wear and main bearing tabs and the crankshaft the crankshaft block. Place the lower main bearings in caps.
|
1 | 68 |
